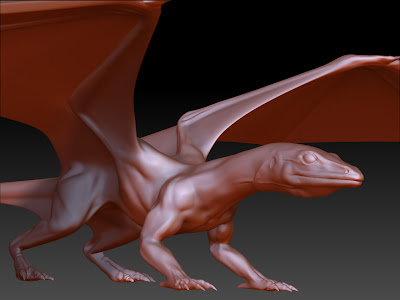
As you read before, I knew what I wanted my dragon to look like, now I just needed to make it. Now, there are a million and one articles out there that will tell anyone willing to look how to make a 3D model. I wont bore you by adding another, but I will quickly show you some of the steps I have been through.
First a create a quick box model, with an approximation of the proportions and anatomy of the dragon. I took this into ZBrush to sculpt a more natural looking shape, with muscle groups and some skin wrinkles and stuff.
Now what is worth noting hear is that while this looks pretty nice, I couldn't use this for the final model. For one thing, the dragon doesn't really have a mouth. It is one solid piece of geometry. So what I did was use this model like a scaffold to help me rebuild a model with the correct topology to function whilst retaining the shape I created. I then took this new model back into ZBrush to start adding more detail.
This dragon now has all the features I need. Fine detail on the skin, a working mouth and the correct shapes and muscles. I could then move onto the job of getting this high detailed model into Maya so the character could be animated. This required texturing and exporting normal maps to create the illusion of high detail on a low detail model.
The project I made this model for required a maximum quad poly count of 6000. Here you can see what I produced.
Now this looks pretty good, and would be ready to go into a game engine for use, and was more than good enough for my module requirements. However, I am not producing a game, I am producing a film. I needed more detail. I threrfore added a displacement map to the model to push up the details, and below you can see something that is almost the finished product.
As the weeks go on, I am going to put more work into improving the look of the surface and ensuring it is as good as I can make it, but I hope this little post has given you some idea how I got from a drawing to a high detail model.
Until later,
Alex


