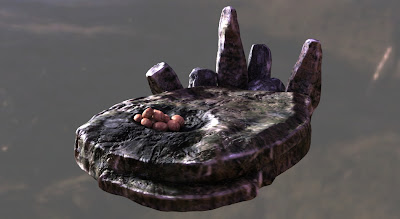
It was decided that some set augmentation was going to be required for this shot. There were no rock formations large enough for a dragon, and it was decided it would be best to simply add a C.G. rock nest. This was a relatively simple modelling job. Basic geometry was created in Maya, then transferred to ZBrush for a high detail sculpt and texturing. The textures were created from reference images taken on the day of the shoot.
The models were than transferred back to Maya with textures and normal maps. The normal maps enable models to appear to have high levels of detail, without having a large effect on render times.
(Click to embiggen image)
Above you can see a test render of the nest with some dragon eggs. You can see I added a black colour around the eggs where the dragon breath has left some carbon deposits with its fire breath.
The standing stones around the main body of the nest are there to mask out the top of the hump that the nest in the background plate. This reduces the need for additional set replacement or compositing at later stages.


No comments:
Post a Comment